Building “The Dreamsicle” / “Orange Split”

This project began, as many good guitar projects do, with a single part that was too interesting to ignore.
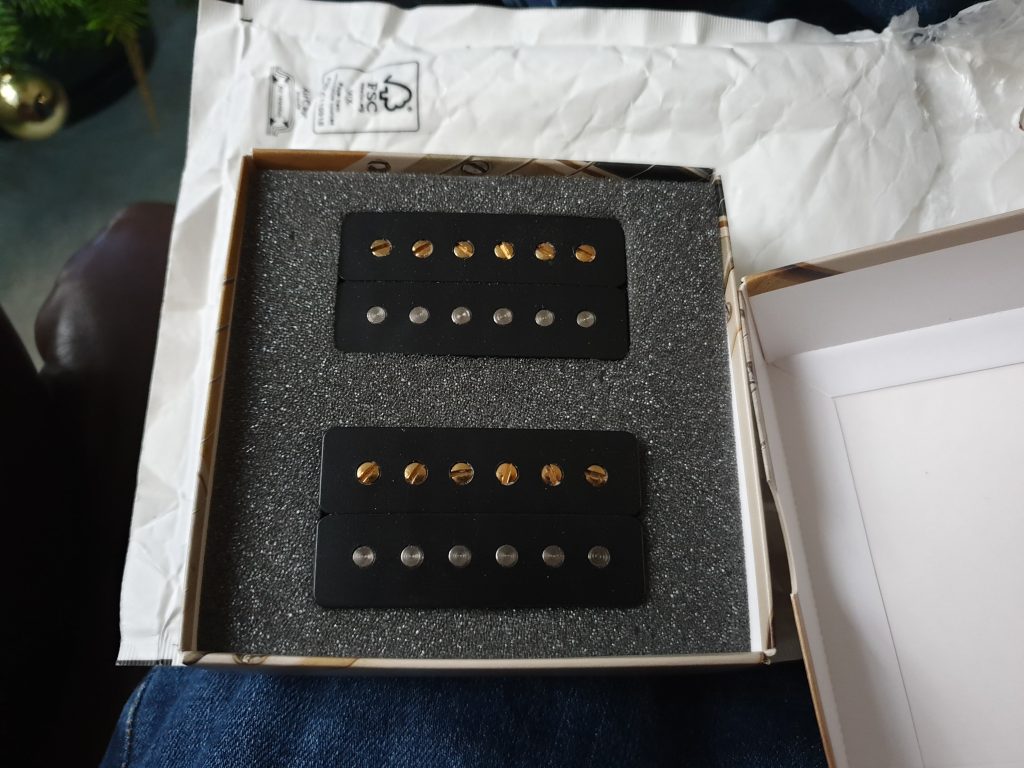
In this case, it was a set of PRS 85/15 MT Artist Package pickups from a PRS Custom 24-08. These are not pickups you can simply buy off the shelf, and they are not ordinary humbuckers either. They are part of the 24-08 system, which means they use four-conductor wiring and are designed to work with mini-toggle switches to provide multiple humbucker and single-coil-style voices.
The result was a guitar build that became part Stratocaster, part PRS Custom 24-08, part Warmoth project, and part learning exercise. It eventually became a Capri Orange Strat-style guitar with a Warmoth neck, PRS electronics, custom switching, and a voice all of its own.
I called it “The Dreamsicle”, although in hindsight “Orange Split” might have been the better name. In the UK, what Americans call a Dreamsicle is usually called an Orange Split, and given that this is an orange guitar built around coil-splitting and tapping ideas, the name practically writes itself.
This is the story of how the guitar came together: the planning, bargain-hunting, shipping disasters, repair work, electronics experiments, fretwork, mistakes, discoveries, and eventual success.
1. The Starting Point: PRS 85/15 MT Artist Package Pickups
The whole build started with a set of PRS 85/15 MT Artist Package pickups from a PRS Custom 24-08.
These pickups were exciting because the PRS 24-08 system is not a standard humbucker setup. The “08” in 24-08 refers to the eight pickup combinations available through the guitar’s switching system. The pickups are typically controlled by two mini-toggle switches, which allow each humbucker to operate either in full humbucker mode or in a single-coil-style mode.
But the single-coil mode is not a typical coil split.
On many humbuckers, splitting the pickup simply shuts off one coil and leaves the other active. This usually results in a noticeable drop in output. The PRS 85/15 MT system is different. Instead of just leaving a standard coil by itself, it uses additional windings on the slug coil to compensate for volume loss. The result is closer to a stronger, fuller single-coil tone rather than a thin, weak split.
I already owned a PRS Custom 24, but I did not want to modify it. I loved that guitar as it was, especially with its 59/09 pickups. So the question became obvious:
If I had these special PRS pickups and did not want to alter my PRS, what should I do with them?
The answer was simple.
Build a new guitar.
2. The Concept: Strat Feel, PRS Voice
I knew early on that I wanted the guitar to be Strat-based.
I had owned a few Strats before. I had also built Warmoth Strat-style guitars in the past. For whatever reason, I often ended up selling them and then regretting it later. There is something about the Stratocaster shape, scale length, ergonomics, and familiarity that keeps pulling me back.
The concept became:
- Stratocaster body shape and feel
- Warmoth neck
- PRS 85/15 MT pickups
- PRS-inspired switching
- Extra custom switching options beyond a normal 24-08
- A vibrant orange aesthetic
- A guitar that felt like home physically, but sounded more like a PRS
The goal was not to copy either Fender or PRS exactly. The goal was to build something that combined the best parts of both worlds.
3. The First Body: A Warmoth Mahogany Soloist with Koa Top
With the pickups in hand, I started looking for a suitable Warmoth body.
Eventually, I found a beautiful project body being sold by Paul, also known as Nexrex. It was a Warmoth Soloist-style body made from mahogany with a flame koa top and a black burst finish. It was unusual, attractive, and original.
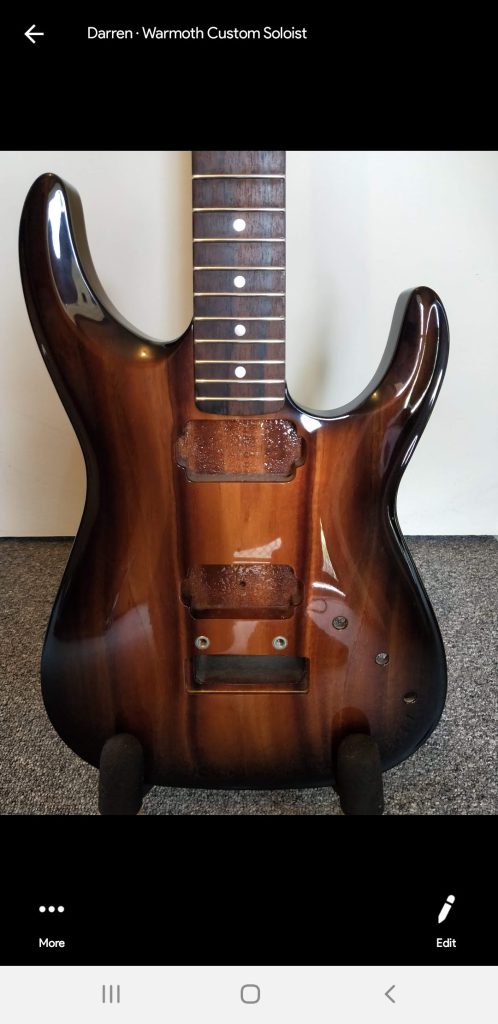
[Photo of: Warmoth mahogany Soloist body with flame koa top and black burst]
The price was good, but there was one complication: the body was in Australia, and I was in the UK.
Since I was not in a rush, we arranged to have it shipped using AusPost’s value service. Even the value service was not exactly cheap, but it seemed reasonable enough. I expected a wait, but I did not expect quite how long that wait would become.
This was the beginning of the COVID period, and shipping was becoming increasingly unpredictable. The body disappeared into the postal system with very little useful tracking information. Weeks became months, and there was no meaningful update from either AusPost or Parcelforce.
At that point, I had to assume that the body might be lost, or at least delayed indefinitely.
So I started thinking about alternatives.
4. The First Neck: A Bargain Warmoth Roasted Flame Maple Neck
While the body was somewhere between Australia and the UK, I began searching for a neck.
I wanted a Warmoth neck, and in my head I had already decided that I wanted either flame maple or bird’s-eye maple. My original guitar teacher had owned an Ernie Ball Music Man Axis Super Sport with a bird’s-eye maple neck, and that guitar left a lasting impression on me. It was probably the first time I remember seeing exotic guitar wood and thinking of it as luxury.
At the same time, I loved flame maple. I associated it with Fender Custom Shop guitars, high-end PRS Wood Library builds, and generally expensive instruments.
I also knew I did not want a traditional lacquered neck. My previous Warmoth had a raw wenge neck, and I loved the unfinished feel. Eventually I found the compromise that made perfect sense:
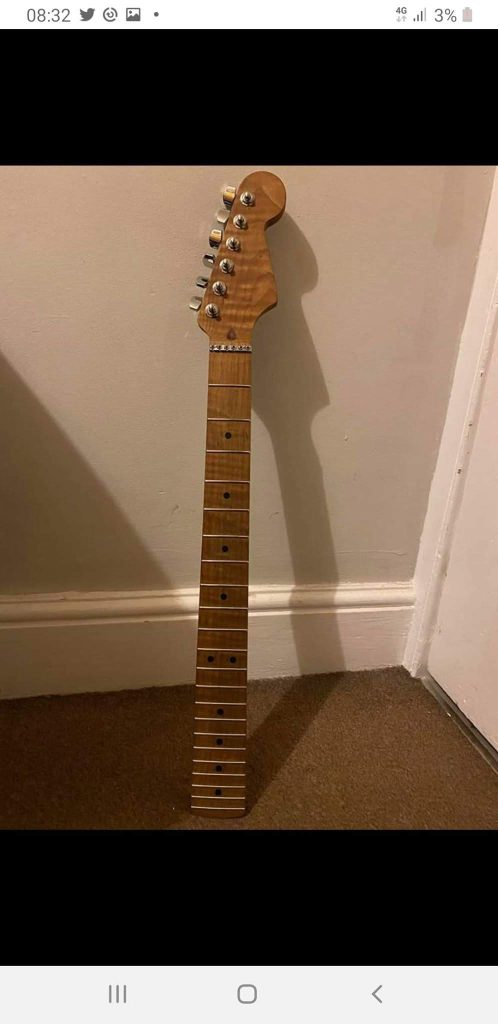
roasted flame maple.
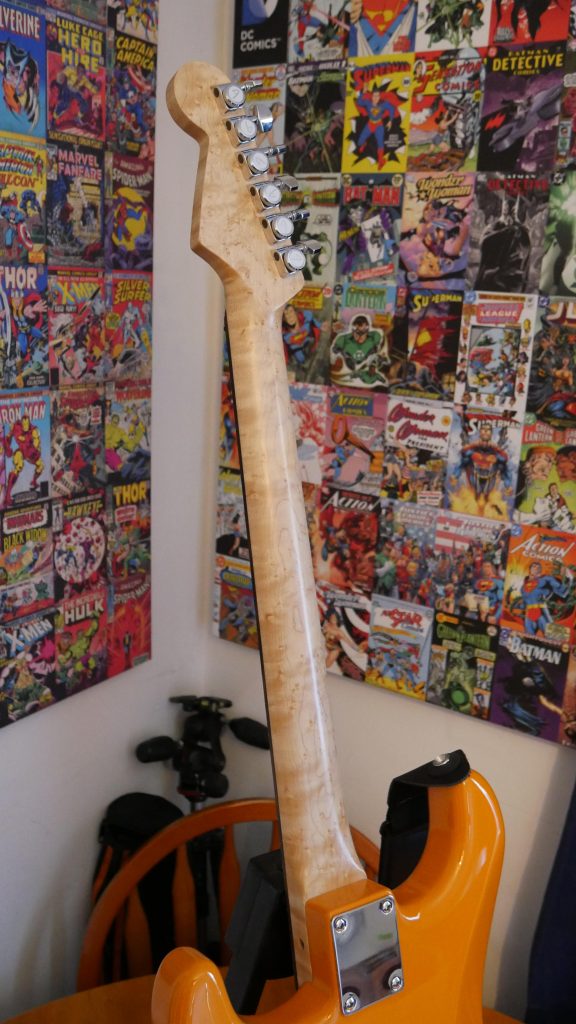
[Photo of: roasted flame maple neck before restoration]
After watching videos and reading tutorials about applying Tru-Oil to roasted flame maple, I was convinced. It looked beautiful, it retained a natural feel, and it could be built up anywhere from satin to gloss depending on the number of coats and finishing method.
Now I just needed to find one for a sensible price.
After scouring Facebook Marketplace and other listings, I found what looked like a great deal: an “as new, bedroom use only” Warmoth roasted flame maple neck with locking tuners and an LSR nut for £300.
Considering the cost of importing a new Warmoth neck into the UK, including shipping, duty, and VAT, this looked like a bargain.
Unfortunately, the excitement did not last.
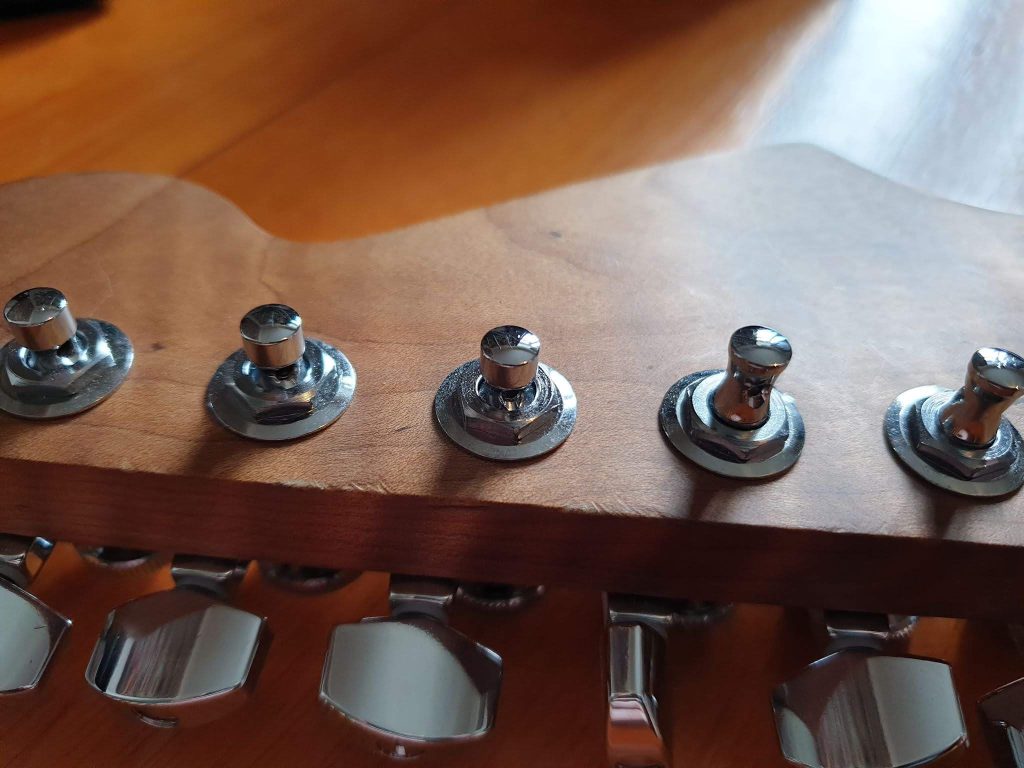
When the neck arrived, it was obvious that the description had been wildly optimistic. Around the nut, exposed wood had been chipped away. The tuners had been installed badly. Some of the tuner locating pin holes were enormous, around 4mm wide. There were dings, scratches, and general signs of careless work.
It was disappointing.
But the figuring in the maple was lovely, and I liked the idea of rescuing it. After some negotiation, I got £90 refunded. Once I mentally discounted the value of the tuners and LSR nut, the neck itself had effectively cost around £110.
At that price, it became a project rather than a disaster.
5. Repairing and Refinishing the Roasted Flame Maple Neck
The neck needed quite a lot of attention.
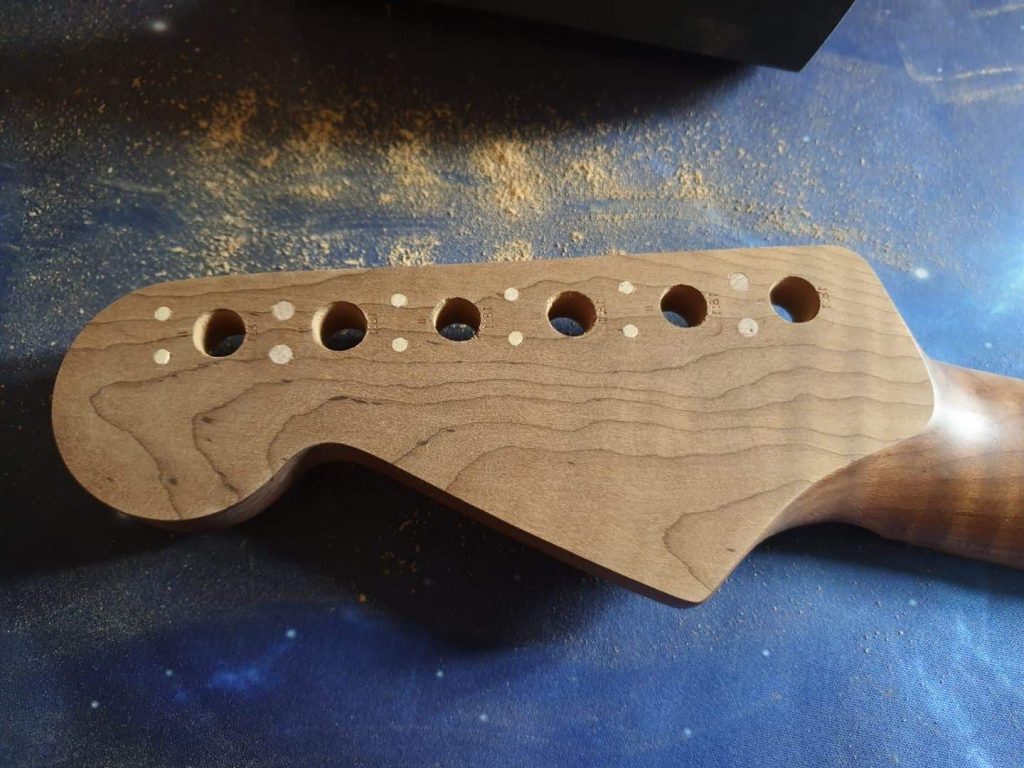
I used files, sanding blocks, dowels, and a lot of patience to bring it back. The damaged areas around the nut were softened and reshaped. The scratched edges were flattened. Dings were reduced or removed. The oversized tuner pin holes were dowel-filled, sanded back, and then re-drilled properly.
[Photo of: damaged tuner holes before dowel repair]
[Photo of: dowel-filled tuner locating holes before sanding]
[Photo of: repaired tuner holes after sanding and re-drilling]
As I worked on the nut area, I found that I actually liked the slightly rounded look that was emerging. That led me to consider rolling the fretboard edges as well. Since the neck was already a repair and refinement project, I decided to go for it.
Rolling the fretboard edges made the neck feel more played-in and more comfortable. It also made it feel more premium, closer to the kind of detail you would expect on a more expensive custom instrument.
[Photo of: rounded fretboard edge after rolling]
Once the reshaping and repairs were done, I moved on to the finish.
I chose Tru-Oil.
Despite the name, Tru-Oil is not really just an oil. It is more like an oil-based varnish. It dries hard, can be built up in layers, and can be polished or knocked back to different levels of sheen.
The key lesson was thin coats.
Very thin coats.
The best method was to apply just enough to make the surface look damp, then let it dry and build slowly. If the coats go on too thick, the finish becomes lumpy and unpleasant. Fortunately, it sands back easily with sandpaper or micromesh, so mistakes can be corrected.
After several coats, the £110 neck had become something genuinely beautiful.
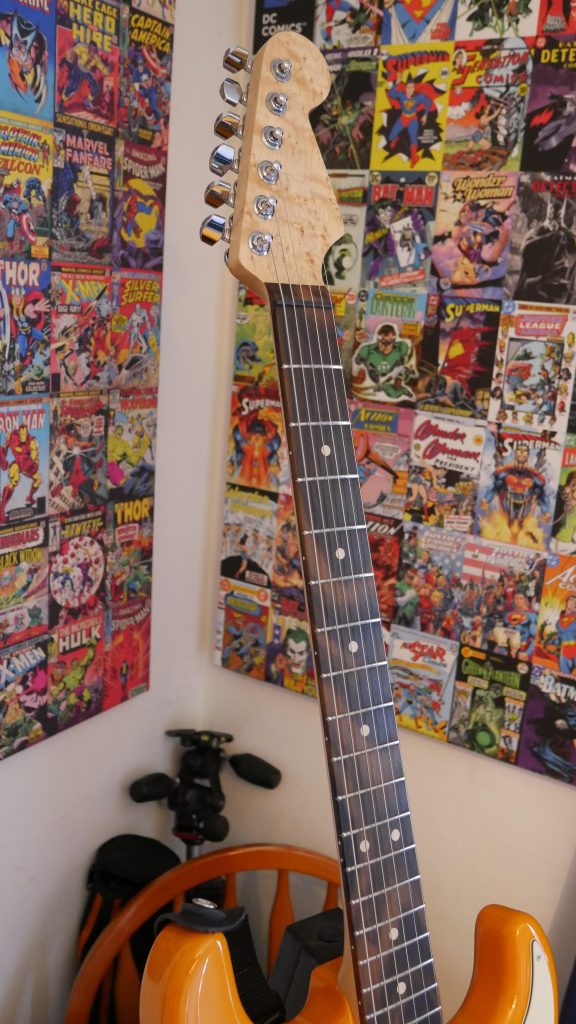
[Photo of: roasted flame maple neck after Tru-Oil finish]
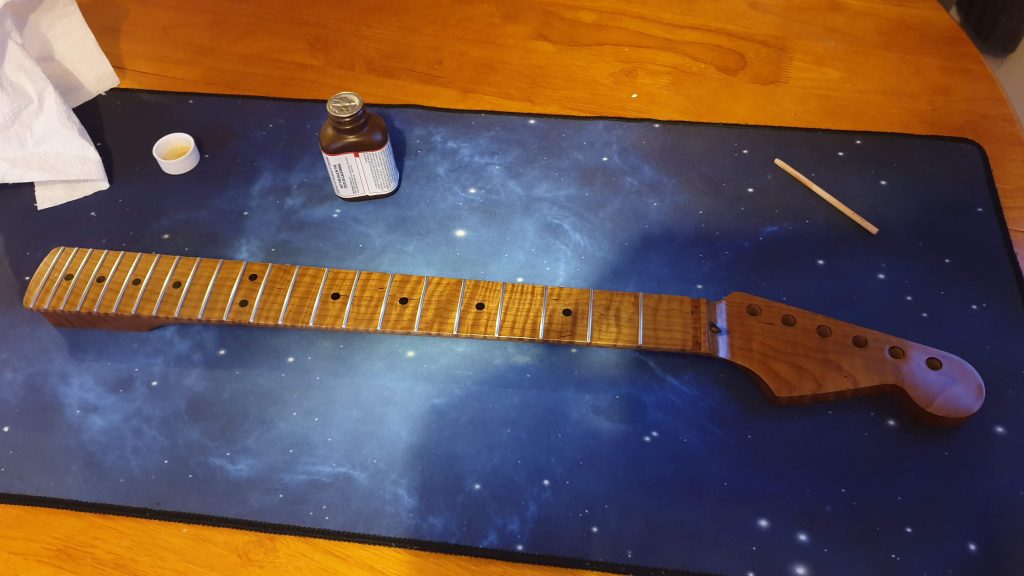
[Close-up photo of: flame figure popping under Tru-Oil]
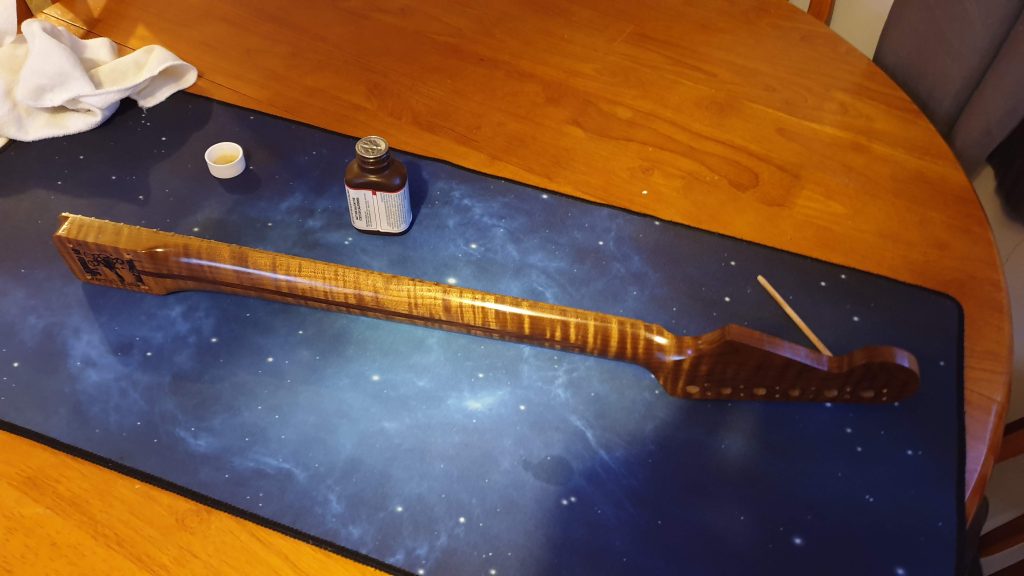
It was no longer just a bargain rescue. It had become a neck I was proud of.
6. The Temporary Body Becomes the Real Body
Because the Warmoth body from Australia still had not arrived, I started looking for a temporary body.
Around that time, Warmoth had announced Capri Orange Strat bodies. I love orange. My life is full of it, and I generally consider vibrant orange to be good luck. A Capri Orange Strat-style guitar immediately appealed to me.
But I did not want to spend £500 or more importing a Warmoth body, only for it to potentially suffer the same shipping delays as the body already on its way from Australia.
So I looked for a cheaper option.
Fender had recently launched the MIM Player Stratocaster series, which had specifications closer to the American models than previous Mexican Standard Strats, including the two-point tremolo. I checked eBay and found that Stratosphere had been parting out new Player bodies in the US. Someone had bought a Capri Orange body, cancelled their project, and relisted it with eBay’s Global Shipping Program.
I managed to buy it for:
- $180 for the body
- $52 tax
- $16 postage
Amazingly, it reached the UK from the US in about ten days, fully tracked and insured.
[Photo of: Fender Capri Orange Player Stratocaster body]
At first, this was supposed to be a temporary solution.
In practice, it became the guitar.
7. Planning the Look: Pickguard, Knobs, and Hardware
With the Capri Orange body in hand, I started planning the overall visual design.
The obvious pickguard choice might have been white, but I felt that plain white looked too stark against Capri Orange. I wanted something softer, warmer, and more vintage-looking.
I initially tried parchment or off-white, but the first guard that arrived was still too bright. I eventually ordered an aged white pickguard, which worked much better. That also allowed me to use aged white soft-touch Strat knobs I had seen, which tied the whole design together.
[Photo of: Capri Orange body with white pickguard comparison]

The aesthetic was becoming clear:
- Capri Orange body
- Aged white pickguard
- Aged white knobs
- Roasted/flamed maple neck
- PRS pickups
- Graph Tech TUSQ saddles
- Clean, slightly custom, but still Strat-like
This was the point where “Dreamsicle” really started to make sense visually.
8. Designing the Electronics
The electronics were the most ambitious part of the build.
The PRS 85/15 MT pickups offer multiple wiring possibilities because of their extra windings. I spent a lot of time reading, testing, and discussing how to wire them correctly, particularly how to access the proper PRS-style tap rather than a normal weak coil split.
The key resistance readings were:
Bass Pickup
| Wiring | Resistance | Description |
|---|---|---|
| Red / White | 7.99k | Standard humbucker, extra slug windings ignored |
| Green / Black | 5.77k | PRS-style stronger single-coil mode, using slug plus extra winds |
| White / Black | 3.9k | Tapped slug only, weaker single-coil tone |
| Black / Red | 4.09k | Screw coil only |
| White / Green | 1.88k | Extra slug windings only |
| Red / Green | 9.88k | All windings |
Treble Pickup
| Wiring | Resistance | Description |
|---|---|---|
| Red / White | 8.54k | Standard humbucker, extra slug windings ignored |
| Green / Black | 5.92k | PRS-style stronger single-coil mode, using slug plus extra winds |
| White / Black | 4.41k | Tapped slug only |
| Red / Black | 4.13k | Screw coil only |
| White / Green | 1.51k | Extra slug windings only |
| Red / Green | 10.04k | All windings |
[Illustration of: PRS 85/15 MT pickup wire combinations and resistance values]
The normal PRS 24-08 system uses mini-toggles to switch between full humbucker and single-coil-style operation.
I wanted to go further.
After studying DPDT switch options, I realized that using on/on/on DPDT mini-toggle switches could give me three modes per pickup rather than two:
- Full humbucker
- PRS-style single-coil mode with extra windings
- A new hybrid mode using the full humbucker plus part of the extra single-coil winding
Combined with a three-way pickup selector, that meant:
- Bridge pickup modes: 3
- Neck pickup modes: 3
- Pickup selector positions: bridge / both / neck
That creates 15 available voicing combinations before even touching the tone control.
[Illustration of: three-way selector plus two three-position mini toggles producing 15 voice combinations]
That was the moment the build became more than just a Strat with PRS pickups. It became its own thing.
9. The Warmoth Body Finally Arrives — Damaged
After three and a half months, the Warmoth body from Australia finally arrived.
Unfortunately, it had not survived the journey undamaged.
The box was crushed and dented, and although the body had been wrapped in several layers of bubble wrap with packing peanuts in the box, the packaging was not strong enough. The body had a large ding in the top horn.
[Photo of: shipping box damaged after transit]
[Photo of: ding in top horn of Warmoth body]
I tried to repair it using dyes and a lacquer build-up method similar to StewMac repair techniques. The result looked acceptable, but I knew the damage was there. Since it was on the top horn, it was hard to ignore.
[Photo of: attempted dye and lacquer repair on damaged horn]
I eventually put that body aside for future refinishing practice. I was not completely in love with the black back and burst anyway, especially knowing there was likely a nice piece of mahogany underneath. The back also seemed odd: it appeared to be sprayed glossy rather than properly lacquered.
At some point, I may strip it and refinish it naturally with oil.
But that would be a project for another day.
For this build, the Capri Orange Fender body had already taken over.
10. Assembly and Soldering Lessons
Once all the parts were together, I started assembling the guitar and wiring the electronics.
The first big lesson came almost immediately:
DPDT micro-switches are much harder to solder than normal guitar components.
Everything I thought I knew about soldering was challenged by those tiny lugs. They do not tolerate much heat. If you try to tin them heavily or spend too long with the iron, they become fragile very quickly. You have maybe two seconds at around 400°C before a lug starts to feel like it is floating.
The better method was:
- Do not over-tin the lug
- Put the pickup wire through or around the lug mechanically
- Solder quickly and decisively
- Avoid excess heat
- Check repeatedly for cold joints
- Test every stage with a multimeter
[Photo of: DPDT on/on/on mini-toggle switches before soldering]
[Photo of: close-up of pickup wires soldered to mini-toggle switch]
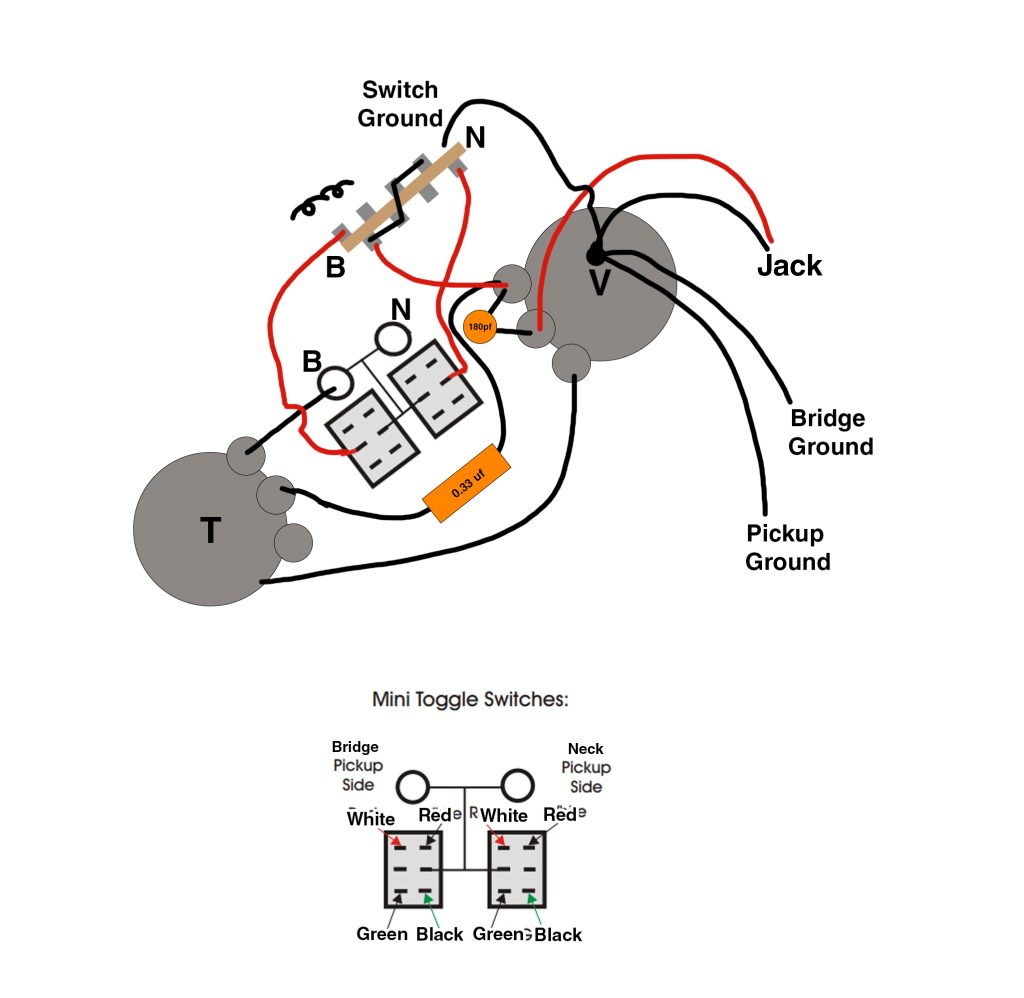
The rest of the wiring was much easier because I had spent so much time planning it. I had my diagram in front of me, and more importantly, I understood what each connection was supposed to do.
That made a huge difference.
Following a schematic blindly is difficult because when something goes wrong, you may not know what you are looking at. But if you understand the circuit, you can test each stage, identify mistakes, and improvise when needed.
For example, if a ground point becomes too crowded, you can find another route as long as you understand what needs to connect where.
[Illustration of: final wiring diagram for PRS pickups in Strat pickguard]
[Photo of: completed pickguard wiring before installation]
The multimeter became essential. It gave me confidence at every step.
11. Hardware Choices
Because the guitar needed a full setup anyway, I decided to make a few hardware choices from the start rather than install temporary parts and change them later.
One of those decisions was to use Graph Tech TUSQ offset saddles. They suited the colour scheme well and potentially offered a small tonal or functional improvement.
[Photo of: Graph Tech TUSQ saddles installed on Fender two-point tremolo]
The bridge was a Fender American Series two-point tremolo, and I used five Fender vintage tremolo springs to deck the bridge.
The final build specification was:
| Part | Cost |
|---|---|
| Warmoth roasted flame maple neck | £110 |
| Tru-Oil | £10 |
| Fender Capri Orange Stratocaster body | £200 |
| Fender locking tuners | £60 |
| Fender LSR nut | £40 |
| Fender American Series two-point tremolo | £85 |
| Graph Tech TUSQ offset saddles | £45 |
| Custom aged white pickguard | £13 |
| Fender soft-touch knobs | £15 |
| Fender vintage tremolo springs, x5 | £10 |
| Fender output jack | £7 |
| PRS 85/15 MT pickups | £195 |
| CTS 500k linear volume pot | £13 |
| CTS 500k modern taper tone pot | £13 |
| Orange Drop 0.033µF capacitor | £3 |
| 180pF volume treble-bleed capacitor | £3 |
| Waxed single-core cable | £10 |
| 22 AWG PVC cable for body ground | £5 |
| CRL three-way switch | £25 |
| Two on/on/on DPDT mini-toggle switches | £8 |
Total cost: almost £900.
That was more than I expected when I added it all up. In theory, I could have bought a used American Strat for similar money.
But that would not have given me this guitar.
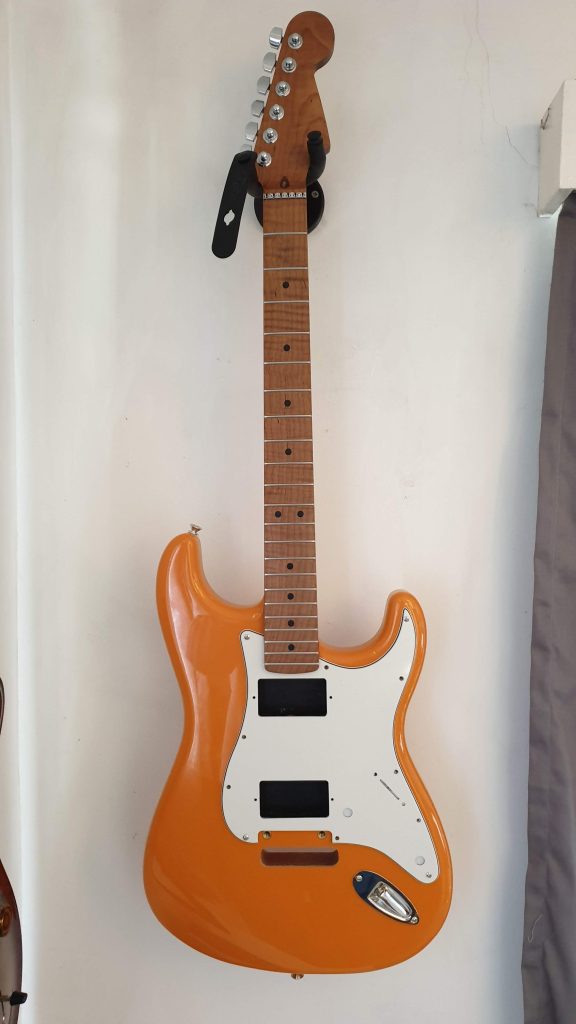
12. The First Completed Version
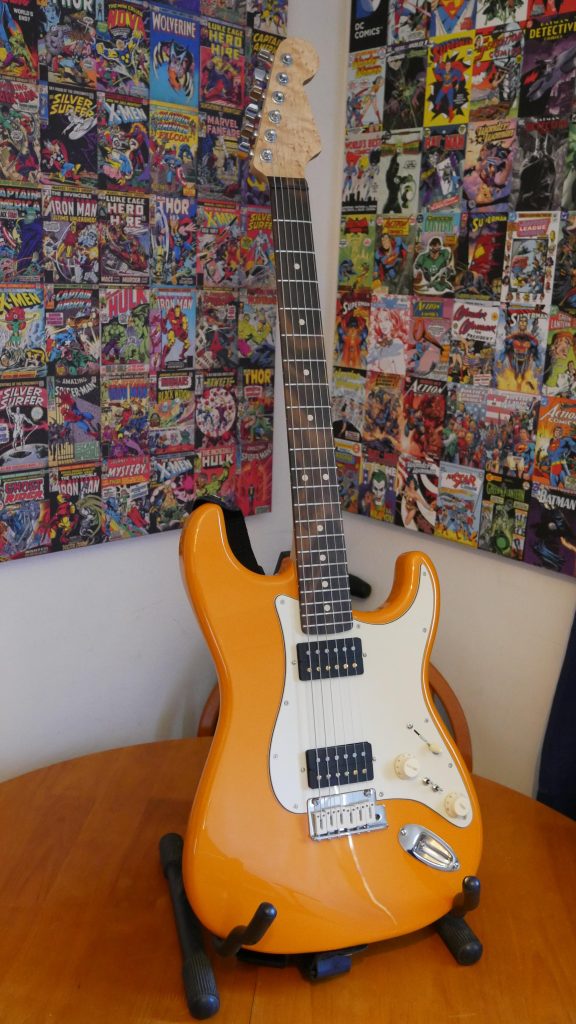
Once assembled, the guitar looked exactly like the idea I had in my head.
Capri Orange body. Aged white guard. Warmoth roasted flame maple neck. PRS pickups. Mini-toggles. Strat ergonomics. PRS-inspired voice.
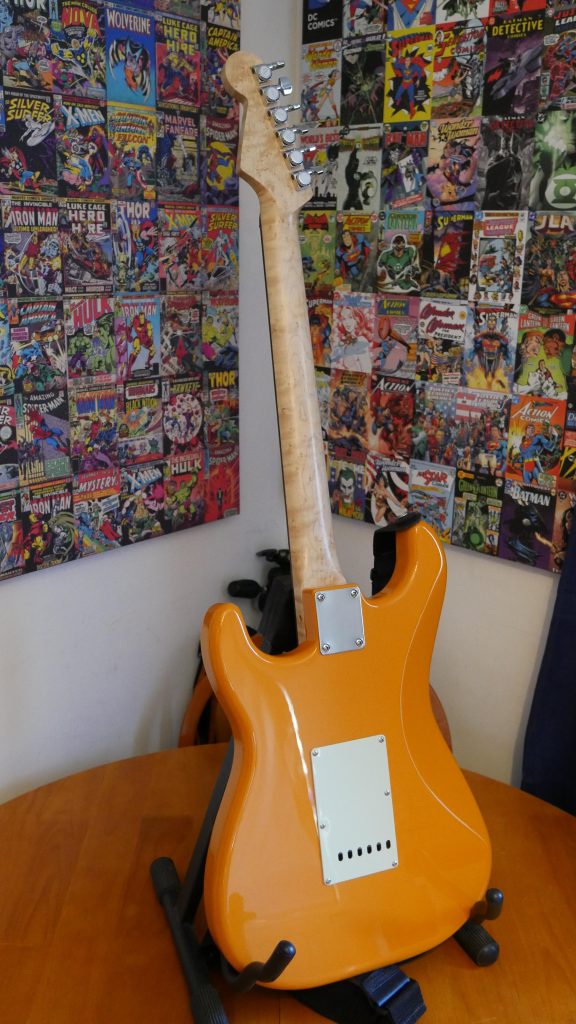
[Photo of: full completed guitar, front view]
[Photo of: completed guitar, rear view]
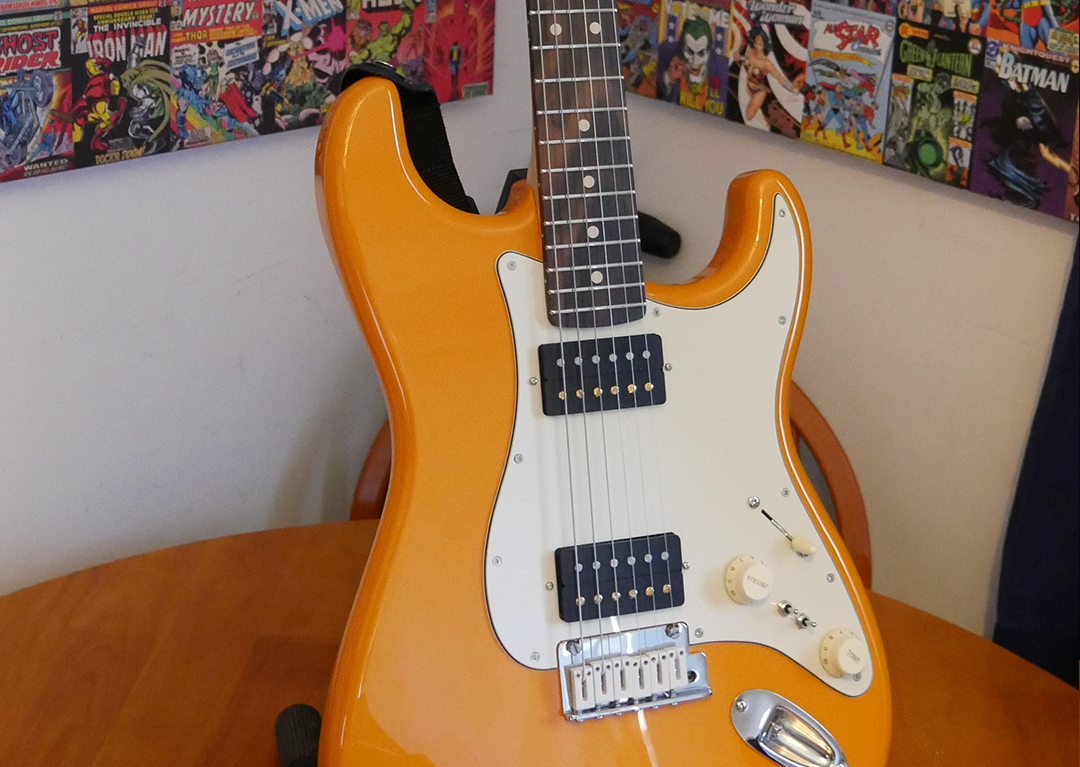
[Photo of: close-up of pickguard showing PRS pickups, three-way switch, two mini-toggles, volume and tone]
It felt like I had somehow hired both the Fender Custom Shop and Paul Reed Smith to build me my personal dream guitar.
It was not a factory model. It was not a replica. It was a custom hybrid built specifically around what I wanted from a guitar.
13. How It Sounded
The guitar sounded much more like a PRS than a traditional Strat.
That was exactly what I wanted.
The PRS 85/15 MT pickups retained their character. The guitar was quiet, the grounding worked well, and the switching options were genuinely useful rather than gimmicky.
The overall result was:
- Strat scale length
- Strat body contour
- Warmoth neck feel
- PRS humbucker voice
- Strong single-coil-style PRS tap sounds
- Additional hybrid voices from the custom switching
[Photo of: guitar plugged into amp or recording setup]
The new middle mode on the mini-toggle was especially interesting. It was effectively the full humbucker combined with part of the extra single-coil winding. Sonically, that meant it had the fullness, mids, and bass of a humbucker, but with added high-end and single-coil-like presence.
It sounded almost like blending a fat bridge humbucker with a split neck single coil, except the effect could be achieved within each pickup position.
It was full, bright, and articulate.
14. What I Learned from the First Build
This project taught me far more than I expected.
I started with no real practical experience in woodworking, guitar building, guitar electronics, finishing, or fretwork. Up to that point, I had usually paid other people to do things or bought finished instruments.
By the end of the project, I had learned:
- How to repair a damaged neck
- How to dowel-fill and re-drill tuner pin holes
- How to reshape and soften damaged wood around a nut
- How to roll fretboard edges
- How to apply Tru-Oil properly
- How to sand back and restart when a finish goes wrong
- How to plan complex guitar wiring
- How to solder tiny DPDT mini-toggle switches
- How to test guitar electronics with a multimeter
- How to troubleshoot wiring by understanding the circuit
- How to ground a guitar properly
- How to do a full setup after assembly
[Photo collage of: neck repair, wiring, assembly, and finished guitar]
The most important finishing lesson was simple:
Tru-Oil must be applied in very thin coats.
Not thin as in “a normal light coat.” Thin as in “just enough to make the surface look slightly damp.”
It takes days or weeks to build a deep, three-dimensional finish, but patience pays off. If you rush it, the finish becomes lumpy and unpleasant. If that happens, sand it back and try again.
The good news is that Tru-Oil is forgiving. It can be removed, re-applied, thickened, flattened, polished, or knocked back to satin.
15. Early Feedback and Reflections
After sharing the build, the response was very positive.
People complimented the repair work, especially given that I had gone into it with very little practical experience. Others understood immediately why someone would build their own guitar: because when it works, it becomes more personal than anything you could simply buy.
That was exactly how I felt.
This was my third custom Warmoth-style Strat project, but it was the first one that felt truly aligned with what I wanted. Previously I had used wiring diagrams and common setups because they were available or easy. This time I worked out what I actually wanted and built toward that.
[Photo of: guitar being played]
Someone also pointed out that pickup maker Zhangbucker had been doing something similar with his “Splat” option for years. That was fascinating because it showed that the idea of adding or manipulating coil windings to get a fuller split sound was not unique, even though I had stumbled into my version through experimenting with the PRS wiring.
That is one of the great things about guitar building. You think you have discovered some strange little trick, and then you find out someone else has been exploring the same idea from a completely different direction.
16. The Name: Dreamsicle or Orange Split?
At first, I called the guitar The Dreamsicle.
The name made sense visually. It was orange and cream, just like the American frozen treat.
But later I realized that, as a Brit, Orange Split might actually be better.
In the UK, that is the more familiar name. More importantly, it is also a perfect double meaning:
- It is an orange guitar
- It is built around split/tapped coil sounds
So while “Dreamsicle” stuck as the original project name, “Orange Split” may be the more accurate name for what the guitar actually is.
[Photo of: completed guitar with orange and cream colour scheme emphasized]
17. The Second Neck: Bird’s-Eye Maple and Ziricote
A few months later, the project evolved again.
The roasted flame maple neck looked great, but I found another Warmoth neck that I could not stop thinking about: a bird’s-eye maple neck with a ziricote fretboard.
[Photo of: new Warmoth bird’s-eye maple and ziricote neck before finishing]
There were several reasons it appealed to me.
First, bird’s-eye maple had a special place in my memory because of my guitar teacher’s Music Man Axis Super Sport. That guitar represented luxury to me when I first saw it.
Second, I had always loved ziricote. I could not afford a full ziricote guitar, but as a fretboard wood it was beautiful. Dense, smooth, and visually dramatic, almost like a more figured alternative to ebony.
Third, the cream colour in the bird’s-eye maple and the cream fret markers seemed like they would work beautifully with the orange-and-cream design of Dreamsicle / Orange Split.
Finally, I had never ordered a brand-new neck directly from Warmoth before. I wanted that experience at least once.
The cost was:
- $310 for the neck
- $90 shipping
- About £81 / $100 in customs and tax
It took five weeks to arrive and turned up in excellent condition.
18. Finishing the Bird’s-Eye Maple Neck
Before finishing, the neck already looked good. But after the first coat of Tru-Oil, it came alive.
[Photo of: bird’s-eye maple neck before Tru-Oil]
[Photo of: bird’s-eye maple neck after first coat of Tru-Oil]
I used a 3:1 mix of Tru-Oil and mineral spirits and planned to build up around 20 coats. I did not expect much flame in the maple, but the Tru-Oil brought out more figure than expected.
The bird’s-eye figuring deepened, and the whole neck took on a richer, warmer look.
[Close-up photo of: bird’s-eye figuring after several coats of Tru-Oil]
I was not initially sure how to treat the ziricote fretboard. In the end, I decided to use a little lemon oil. The only real downside I had seen mentioned was that it might darken the wood slightly, but that was actually what I wanted.
Ziricote behaved more like ebony than rosewood. It did not absorb much oil, but the small amount it did take made it look more finished and complete.
[Photo of: ziricote fretboard before lemon oil]
[Photo of: ziricote fretboard after lemon oil]
The result looked excellent.
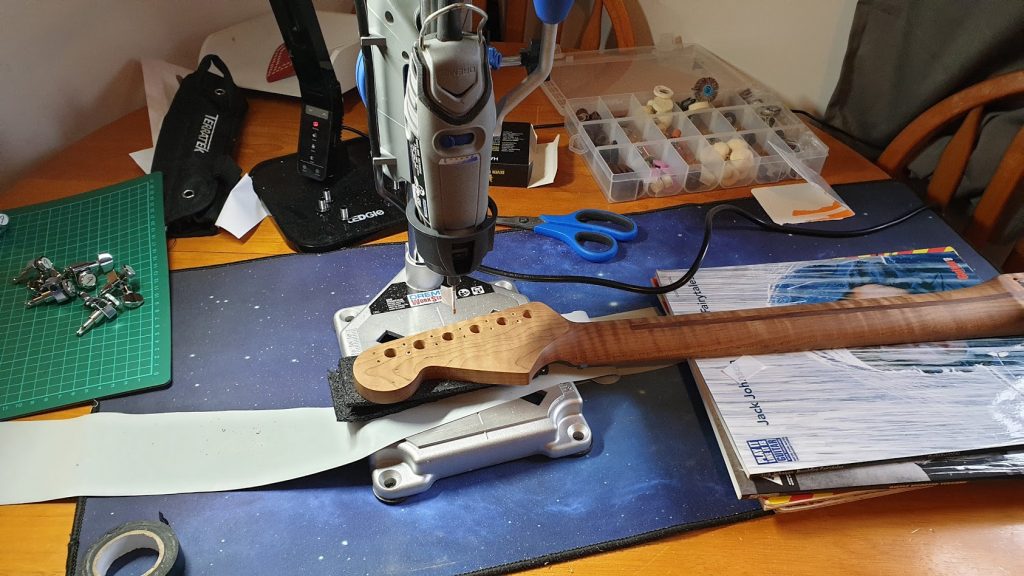
19. Rolling the Fingerboard and Preparing for Fretwork
Before installing the new neck, I decided to roll the fingerboard edges slightly.
I used a blade to remove most of the material carefully, then finished with micromesh. The goal was not to dramatically reshape the fretboard, but to make it more comfortable and give it that smoother, more broken-in feel.
[Photo of: fingerboard edge before rolling]
[Photo of: fingerboard edge after rolling]
At this point I had also received some new tools for my birthday, including:
- Notched straight edge
- Fret rocker
- Levelling beam
- Fret crowning file
- Sandpaper and micromesh
That meant I could attempt my first full fret level, crown, and dress.
20. First Fret Level, Crown, and Dress
The first step was adjusting the truss rod until the neck was flat using the notched straight edge.
[Photo of: notched straight edge on fretboard]
Then I protected the fretboard with tape.
[Photo of: fretboard fully taped before fret levelling]
Using the levelling beam and the usual permanent marker technique, I began levelling the frets.
This was revealing.
Some people say Warmoth necks arrive ready to play. In my experience, this one was not. Maybe some people get lucky, maybe some are happy with more buzz, or maybe they simply do not know what a truly level fretboard feels like. But this neck needed work. The frets were not evenly level.
[Photo of: marked frets before levelling]
[Photo of: levelling beam in use]
Once the frets were level, I used a crowning file to restore their rounded shape while leaving a narrow level peak along the top.
[Photo of: frets after levelling, before crowning]
[Photo of: fret showing black marker line during crowning]
I also spent time rounding and smoothing the fret ends using techniques similar to those shown by StewMac. My goal was to get the fret ends looking and feeling more like those on my PRS: smooth, rounded, and comfortable without removing too much material.
[Close-up photo of: fret ends before dressing]
[Close-up photo of: fret ends after dressing]
I checked progress with the fret rocker throughout.
[Photo of: fret rocker checking for high frets]
Then I worked through sandpaper and micromesh grits to remove scratches and polish the frets.
[Photo of: polished frets after micromesh]
This was my first ever fret levelling, crowning, and dressing job. I followed online advice, used the right tools, and took my time. It was not especially difficult, but it was slow. The whole process took around four hours.
I probably used too many grades of sandpaper, but the end result was worth it.
[Photo of: completed fretwork on ziricote fretboard]
21. Installing the Bird’s-Eye/Ziricote Neck
Once the fretwork was finished, the new neck went onto the guitar.
[Photo of: guitar with bird’s-eye maple and ziricote neck installed]
The setup was easy. The string tension gave enough relief that the truss rod needed no further adjustment. There were no high frets causing buzz, and the guitar played cleanly.
Visually, the new neck suited the guitar beautifully.
The cream dots, cream-toned bird’s-eye maple, dark ziricote fretboard, aged white plastics, and Capri Orange body all worked together. It made the guitar look more complete and more intentional.
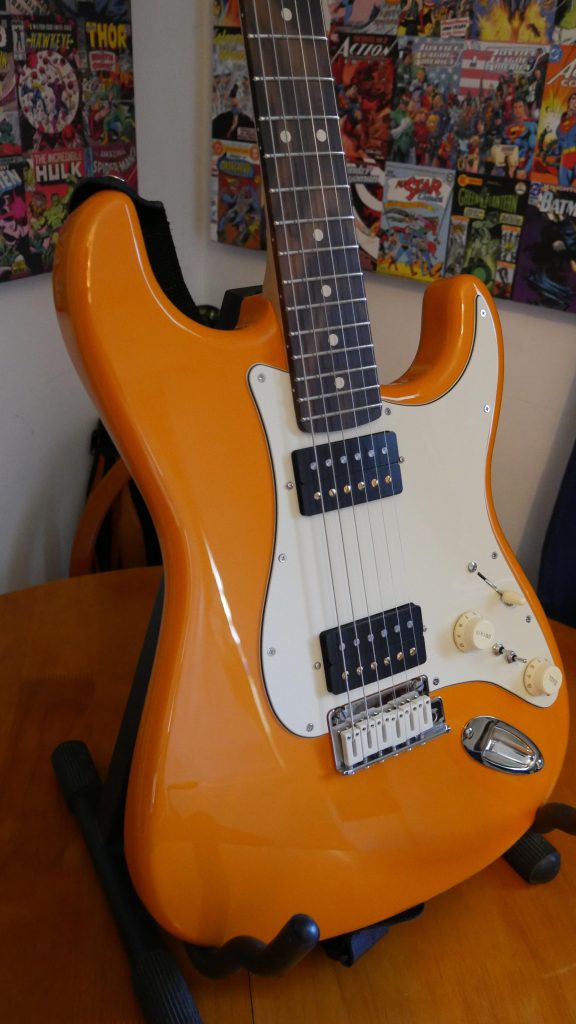
[Photo of: full guitar with new neck, front view]
[Photo of: close-up of orange body, aged white pickguard, and ziricote fretboard]
The original roasted flame maple neck was not wasted. It moved on to another project, where it would get the same fret-levelling treatment.
22. Final Thoughts
This guitar became far more than a parts build.
It started with a set of rare PRS pickups and became a deeply personal instrument. Along the way, it involved:
- A delayed and damaged Warmoth body from Australia
- A cheap Capri Orange Fender body that unexpectedly became the main body
- A damaged roasted flame maple neck rescued and refinished
- A complex PRS-inspired wiring design
- Custom switching with 15 possible voices
- Graph Tech and Fender hardware choices
- A later upgrade to a bird’s-eye maple and ziricote Warmoth neck
- First attempts at fret levelling, crowning, dressing, rolling edges, and finishing
[Photo of: final completed Dreamsicle / Orange Split guitar]
The final result gave me exactly what I wanted:
- The feel and ergonomics of a Strat
- The scale length and body contour I like
- The voice and richness of PRS pickups
- A switching system that goes beyond a normal PRS 24-08
- A look that feels personal and distinctive
- A guitar I bonded with immediately
It may have cost almost as much as a used American Strat, but it gave me something far more specific.
It gave me a guitar that feels like it was built for me — because it was.
And perhaps most importantly, it taught me that building, repairing, wiring, finishing, and setting up a guitar is not magic. It takes patience, research, tools, and a willingness to make mistakes. But it is absolutely possible to learn.
The end result is not just an instrument.
It is a record of the process, the problem-solving, the mistakes, the fixes, and the moments where everything finally comes together.
For now, The Dreamsicle / Orange Split is everything I hoped it would be.
[Photo of: final guitar in natural light]
[Photo of: final guitar being played]
[Photo of: close-up beauty shot of pickups, switches, and aged white controls]
Comments